File Access
This document explains how to configure WebDAV clients to access Drupal files. This is useful when you are doing development or if there are needs to upload specific files to particular parts of the Drupal space. It also allows manual cleaning in the event of errors. You can choose between different methods to access to the files.
Windows
Microsoft WebDAV client - graphical interface
Note: Some users have reported problems with long timeouts and retries using the Microsoft WebDav client. While waiting for a fix from Microsoft, it is recommended to use the cyberduck option outlined below.
- Open Computer by clicking the Start button, and then clicking Computer
- Click Map network drive
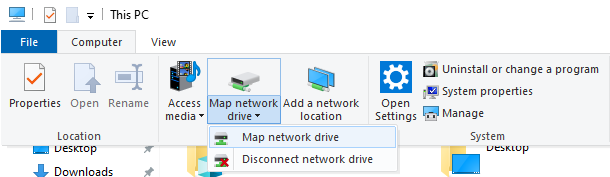
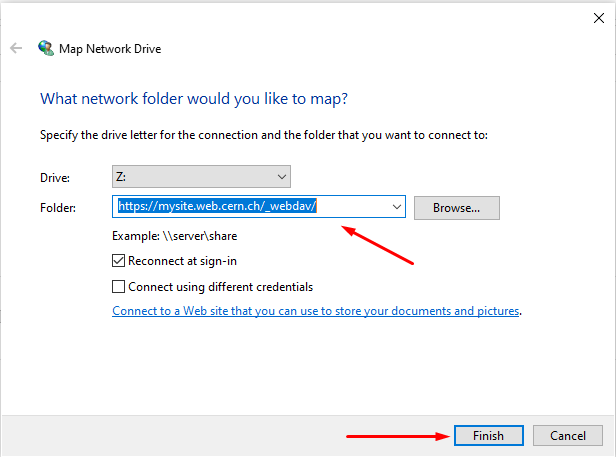
- In the Drive list, you can choose any available letter
- In the folder box, enter WebDAV client direct link for your site (use
/_webdav/, with slash at the end). - You will access the site with the account you are logged in in the computer. Check “Connect using different credentials” box in case you want to use any other user.
- To connect every time you log on to your computer, select the “Reconnect at logon” check box
- Click Finish.
You will be prompted for your CERN username and password. Do not include Windows domain with your username:

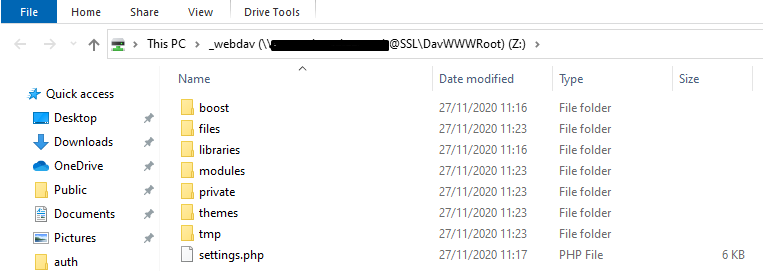
Drupal files are now available as a network drive in your computer:
Select:
- Protocol is WebDav (HTTP/SSL)
- Server is the name of your site (such as it-demo.web.cern.ch)
- Unselect the checkbox for anonymous login (so you can enter your CERN credentials)
- User name is your CERN account
- Password is the password for your CERN account
- In ‘More Options’, enter the path of “/_site/files” for Drupal 7 site, and “/_webdav” for a Drupal 8 website
- Select Connect
A list of files in the site should then appear.
Linux
Cadaver
Cadaver is a command-line WebDAV client for Linux systems. The advantage of this client is that it can be used in scripts for automated upload/download of files. You can connect as follows:
cadaver https://mysite.web.cern.ch/_webdav
Mac
Finder
In Finder select “Connect to Server” and provide Server Address:
https://mysite.web.cern.ch/_webdav/
In the next window, choose Connect as “Registered User”:
User: your CERN username, do not include CERN domain name (i.e.,gtimofie, and notCERN\gtimofiePassword: your CERN password
Click Connect.
Cyberduck
Supports Windows and Mac.
Cyberduck is an open source webdav client (along with supporting many other protocols). It can be used to work around issues with Windows connecting to sites which repeatedly request the user id / password.
To download cyberduck, go to https://cyberduck.io/ and select the installation image you wish from the block.
Refer to the documentation under help/en/howto/dav – Cyberduck in order to configure it.
Select:
- Protocol is WebDav (HTTP/SSL)
- Server is the name of your site (such as it-demo.web.cern.ch)
- Unselect the checkbox for anonymous login (so you can enter your CERN credentials)
- User name is your CERN account (e.g.,
gtimofie) - Password is the password for your CERN account
- In ‘More Options’, enter the path of
/_webdavfor a Drupal 8 website - Select Connect